When shipping bulk items, it’s important to secure them in place during transit. With that in mind, the question “How do you use a banding tool?” has been posed to us. This blog post will cover all the information you will need to know about banding tools.
Let’s get started.
If you are looking to shop steel strapping, do so here, or learn what is metal strapping and our breakdown here.
Why Are Banding Tools Used?
It’s important to understand why we band items in the first place. Banding, also known as strapping, holds something in a fixed spot, typically for shipping reasons. Some options in the industry are plastic and steel banding tools among others. Depending on the size of the items that are being banded, a decision will need to be made on which to use.
How to Choose Between Steel And Plastic
There are a variety of factors involved in making the decision between steel and plastic.
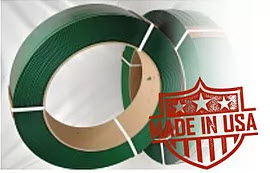
If you are shipping low-weight boxes, plastic banding is typically used. Also, if items that need to be secured are to be checked on or people will have to access them, plastic is a lot more convenient. Plastic is relatively more affordable but less reliable.
Steel has the strength that plastic does not, for securing bulk products or machinery. Also, one must consider where you are transporting goods. For example, in high stress areas like factories, items really need to be secured well even if they aren’t particularly heavy.
Steel banding is also used for construction, transporting light poles, and other heavy goods. With greater durability, resistance to outdoor elements, and additional strength, steel banding is the superior option.
The “How-To”
Steel Banding Tools
For steel banding tools, the first thing to consider is the use of safe or standing edging. It’s usually better to use safe edging. Next, make sure that you don’t forget to use the metal seal when securing the goods.
- Cut the banding tool to a length with a little extra at the end.
- Thread the wire through the seal and fold it inside of itself.
- After that, loop the banding around the items that are being secured.
- Feed the banding wire’s end to the first seal.
- And pull hard until it’s clear that it is fastened securely and properly.
- Lastly, tap down the bands with a hammer.
Plastic Banding Tools
For plastic banding tools, the first thing you will do is make sure you have the plastic banding, a sealer, tensioner, and some metal seals.
1) Position the plastic banding strap and use the tensioner to feed it through.
2) Tighten the plastic banding strip by grabbing the strap coming out the bottom and feed it through the tensioner tool.
3) Thread it through the cutter tool in front of it, then the ratchet next, and stop.
4) Lift the tensioner tool up and down several times, which will add tension to the two straps.
5) With the tool still in place, grab one of the metal seals and put it over the overlapping banding strap ends.
6) Use the sealer tool to open the arms and then clamp directly over the seal.
7) Bring the “arms” together close to where the metal seal opens.
8) And then release, in order to secure it.
9) Lastly, crank the large handle of the tensioner to cut away the excess strapping.
Final Thoughts
A good rule of thumb: the wing seals are commonly used with a stainless steel strap, which is a fancy version and not typically used for shipping. Most of us will use painted and waxed steel strapping with metal seals. The main difference is that the steel strap seals are notched, and the poly strap seals are crimped!
Now we know what banding tools are, why they are used, how to choose between steel and plastic, and how to use the banding tools to secure goods. Did you know Vulcan Wire sells a variety of wiring and packaging tools? Take a look here or request a custom quote today.


